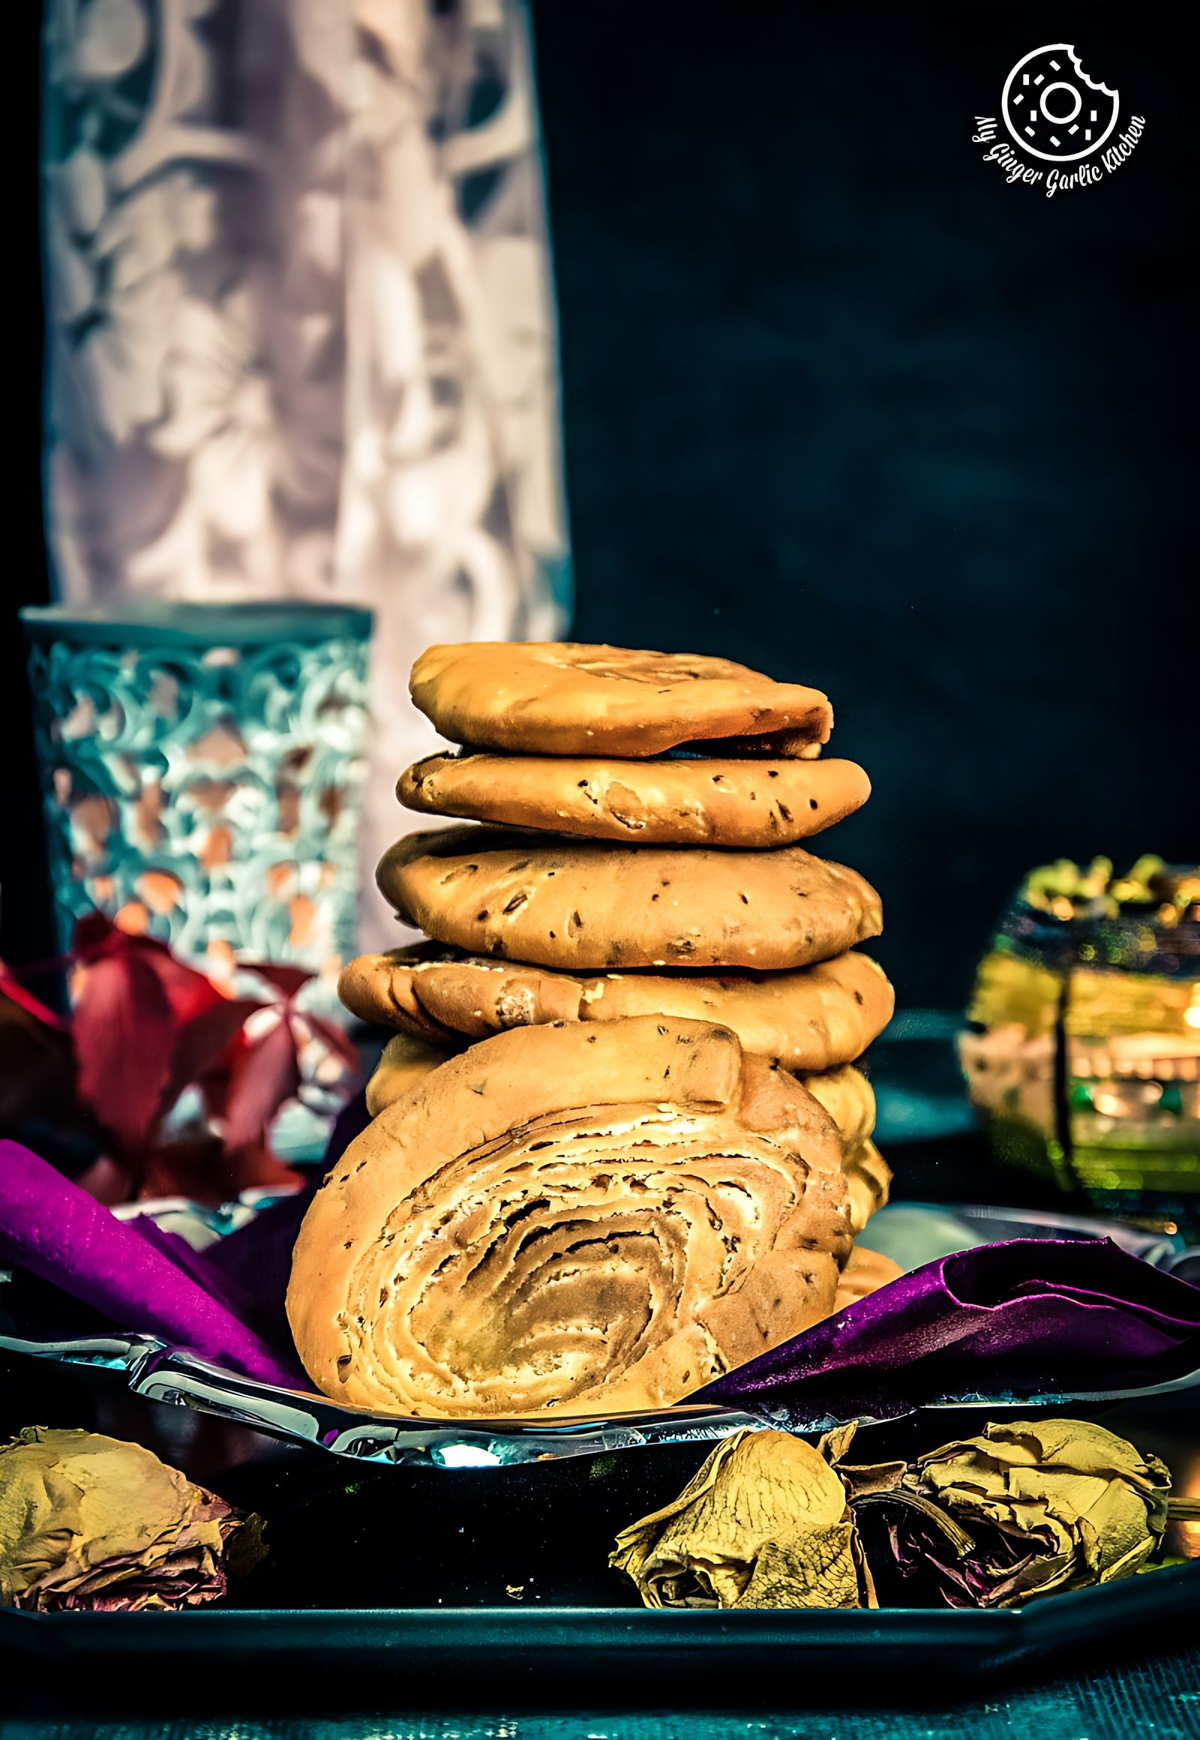
Verki Puri - Crispy Tea Time Snack
Verki Puri is a flaky and crispy deep-fried tea time snack made with flour, cumin seeds, carom seeds, black pepper, salt, and ghee. Best serves with tea.
Recipe Source Link:https://www.mygingergarlickitchen.com/verki-puri/
« Go back Print this recipe »
Prep Time = 40 minutes
Cook Time = 30 minutes
Total Time = 1 hour(s) 10 minutes
Category = Snacks
Cuisine = Indian
Serves = 12
Nutrition Info = 145 calories
Serving Size = 1 Puri
RECIPE INGREDIENTS
» For Verki Puri Dough //
- 1.5 cups all-purpose flour (maida) + 3 tablespoons for dusting
- 3 tablespoons semolina (rava)
- 1 teaspoon cumin seeds (jeera)
- Salt to taste
- 1 teaspoon carom seeds (ajwain), slightly crush between palms
- 2.5 tablespoons hot ghee or oil + 1/4 teaspoon for greasing dough
- 1/2 teaspoon crushed black pepper (kali mirch)
- Warm water for kneading dough
» For Paste //
- 2 tablespoons melted Ghee
- 2 tablespoons cornflour, or more if needed
» For Cooking //
- Oil for deep frying
RECIPE INSTRUCTIONS
» How to Make Verki Puri Dough //
- In a large mixing bowl, add flour, semolina, cumin seeds, salt, and carom seeds, and hot ghee or oil.
- Using your fingers, rub the ghee and flour mixture. The ghee is hot, so be careful while mixing.
- Keep mixing until it ghee is well incorporated in all of the flour. This would take about 4-5 minutes. At this point, it resembles breadcrumbs and holds shape. To check, take some flour mixture between your palm and make a fist. If it holds the shape then you have added enough fat. If the dough falls to pieces, that means you need to add more oil/ghee.
- Start by adding the water little by little and knead it into a semi-stiff dough. Semolina absorbs water while resting, so don't knead it too firm.
- Cover and let it rest for 30 minutes.
» Make Ghee Flour Paste //
- In a small bowl, add melted warm ghee and cornflour.
- Stir well to make a smooth and lump-free paste. The paste should be of flowing consistency. So feel free to adjust the amount of ghee/flour. Keep it aside.
» Roll and Shape Verki Puri //
- After 30 minutes, knead the dough again.
- Divide dough into 7 pieces and shape them into balls.
- Dust each ball with dry flour and roll them as thin as possible. Try to roll all the sheets of similar sizes.
- Place a rolled sheet on the work surface and generously slather it with the prepared ghee and flour paste. Sprinkle with some dry flour.
- Place the 2nd rolled sheet on it and brush it with ghee and flour paste. Then sprinkle with dry flour. Do this with all the remaining sheets.
- When 7 rolled sheets are stacked on, apply the same ghee and flour paste and sprinkle with some flour.
- Start rolling up tightly from one corner to another. Roll it further until all the edges are sealed tightly.
- Trim the edges and cut them into 1 to 1/2-inch pieces from the log.
- Flatten each piece slightly using your palm and roll with gentle pressure.
» Deep-fry Verki Puri //
- Add enough oil to broad pan or Kadai and heat over medium heat. When the oil is hot, drop the rolled poori and fry them on medium-low low heat.
- Keep stirring occasionally, and deep fry puris until they are golden and crisp from both sides. Frying would take some time, so be patient.
- Using a slotted spoon, shake off excess oil and remove from oil.
- Place them over a kitchen paper-lined plate to remove excess oil.
- Let them cool completely before storing in an airtight container. Verki Puri stays fresh at room temperature for up to 1 month.
- Serve verki puri with tea or coffee.
RECIPE NOTES
- Always roll dough balls as thin as possible. This step ensures the perfect layers.
- I use all-purpose flour (maida) for making verki puri, but you can also use whole wheat flour or the combination of both flours.
- While frying the puris, make sure the oil is neither too hot nor too cold. Always deep-fry puris on medium-low heat until they are golden from all sides.
For questions and suggestions:
If you have any questions or suggestions about this recipe, please do contact us via this contact form or via the social channels:
Website: www.mygingergarlickitchen.com // Contact Form // Facebook Page // Youtube Page // Instagram Page // Pinterest Page